There's an unmatched thrill in deer hunting, waiting silently and unseen, anticipating the majestic creature to wander into view. But to maximize your chances of a successful hunt, especially in deer hunting and bow hunting, a hunting blind is essential.
No matter the terrain—be it lush woods, open food plots, or grassy plains—having a custom hunting blind can be your game-changer. Whether you're looking into how to build a hunting blind for the first time or aiming to upgrade your current setup, this guide is designed to walk you through the steps, ensuring you have the best hideout in the wild.
Understanding the Basics of a Hunting Blind
A hunting blind, often interchangeably used with the term "deer blind," is a camouflage shelter used by hunters to remain hidden from their prey. This cover provides hunters with a concealed spot, allowing for closer observation and better shot opportunities. There are primarily two types of hunting blinds: the deer stand and the ground blind. Here's a brief breakdown of each:
- Deer Stand: An elevated structure, often several feet tall, that provides a vantage point above the ground. The height can be a great advantage, especially when you're surveying vast food plots or tracking deer movements across larger terrains.
- Ground Blind: As the name suggests, this blind is at ground level. It is a favorite for many because of its ease of setup and how it can seamlessly blend with the surroundings. Ground blinds work great for both bow hunting and gun hunting, offering flexibility depending on the hunter's preference.
It's worth noting that the choice between a deer stand and a ground blind often comes down to the terrain and personal preference. For instance, in dense woods where vertical visibility might be limited, a ground blind might be more effective. On the other hand, in open terrains, the elevated view from a deer stand can be invaluable.
Why Go DIY?
With numerous ready-made options available in the market, why should one consider the DIY route? Well, there are a plethora of reasons:
- Customization: One of the main advantages of a DIY hunting blind is the ability to tailor it to your exact needs and the specific terrain you hunt on. Whether it's adjusting the size, creating specific openings for bow or gun hunting, or selecting materials, going DIY ensures that every detail aligns with your hunting style.
- Cost-Effective: Buying a pre-made blind can sometimes be heavy on the pocket. On the other hand, sourcing materials like treated plywood and following a step-by-step guide on how to make a hunting blind can save you a significant amount.
- Personal Satisfaction: There's a unique sense of achievement in building something with your hands. Every time you settle into your DIY hunting blind, there's a sweet reminder of the effort and creativity you poured into your custom hideout.
In the world of hunting, having an edge can make all the difference. Building your hunting blind offers that edge, ensuring you are well-prepared for the hunting season.
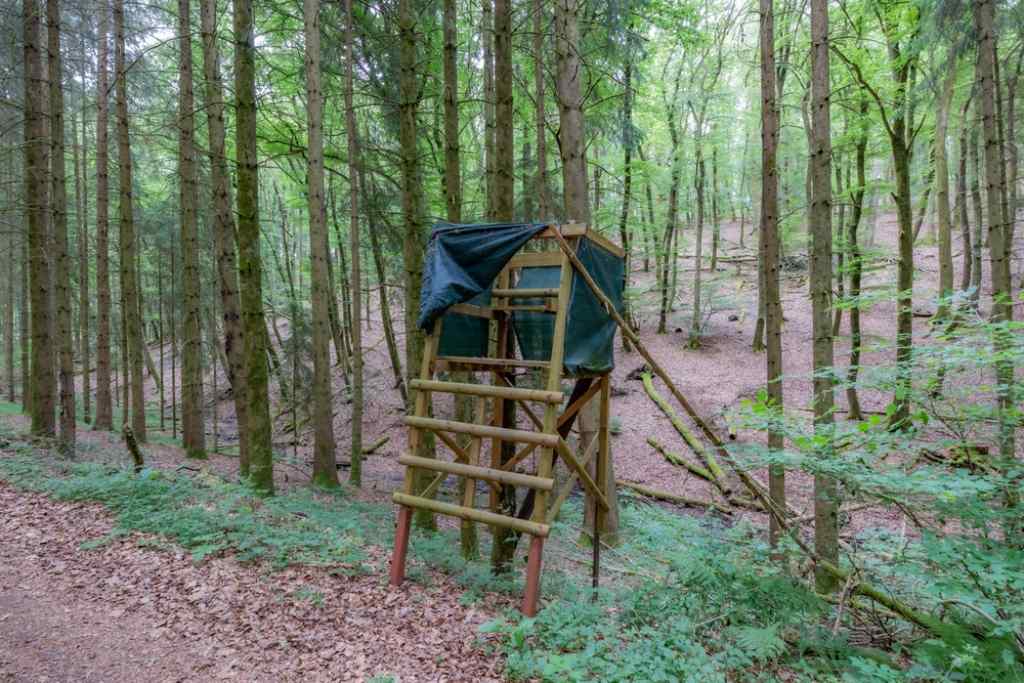
Step-by-Step Guide: Building a Ground Blind
Hunting blinds have evolved over the years, becoming sophisticated structures tailored to specific hunting styles. One such popular style, especially for those not keen on heights or for those looking for a more mobile option, is the ground blind. The simplicity, flexibility, and stealth offered by these blinds make them an excellent choice for both novice and experienced hunters.
So, let's dig into the step-by-step guide on building a DIY hunting blind suitable for various terrains.
Materials Needed:
- Treated plywood (for durability against the elements)
- Sturdy poles or frames (for structure)
- Camouflage netting or fabric
- Screws and nails
- Basic tools (hammer, saw, screwdriver)
- Natural materials from the area (branches, leaves, etc. for added camouflage)
Step 1: Choosing the Perfect Spot
Location is paramount. You'll want to be near food plots or along deer trails where animals frequent. Also, consider wind direction and sun position. Ensure your blind's entrance faces away from common deer approaches to reduce the chances of being spotted.
Step 2: Laying the Foundation
Clear the selected spot of any debris or large stones. You want a flat surface to build upon. Lay down your treated plywood as the floor of your blind. This will provide a solid, quiet base to move on, and the treatment will ensure longevity against moisture and pests.
Step 3: Constructing the Side Walls
Start by framing out your blind using sturdy poles. These frames provide the skeleton upon which you'll attach your walls. For the walls, use treated plywood, ensuring they stand about 6 feet tall. This height offers adequate coverage while still allowing mobility inside.
Remember to leave spaces for windows or shooting ports, tailored to your preference, be it bow hunting or gun hunting.
Step 4: Creating Openings
Design your windows or shooting ports strategically. Some hunters prefer vertical slits for bow hunting, while others like broader openings for gun hunting. Make sure these openings provide a good field of view but are also easy to conceal when necessary.
Step 5: Camouflaging for the Hunting Season
This is where creativity comes into play. Start by attaching camouflage netting or fabric to the outer walls.
Following this, use natural materials from your surroundings. If you're in a wooded area, branches and leaves work great. In grasslands, tall grasses and hay can be effective. The aim is to ensure the blind seamlessly blends with its environment.
Benefits of a Ground Blind:
- Mobility: One major advantage is that you can easily move your blind. If one spot doesn’t seem fruitful, simply disassemble and relocate.
- Versatility: A ground blind is suitable for various terrains. Whether you're in dense forests or open plains, it's easy to set up and adapt.
- Concealment: Its low profile and camouflage capabilities make it less noticeable to deer, increasing your chances of a successful hunt.
A DIY hunting blind gives you the flexibility and customization that store-bought ones might lack. While it requires effort and a bit of craftiness, the results, coupled with the satisfaction of creating something on your own, make the endeavor well worth it.
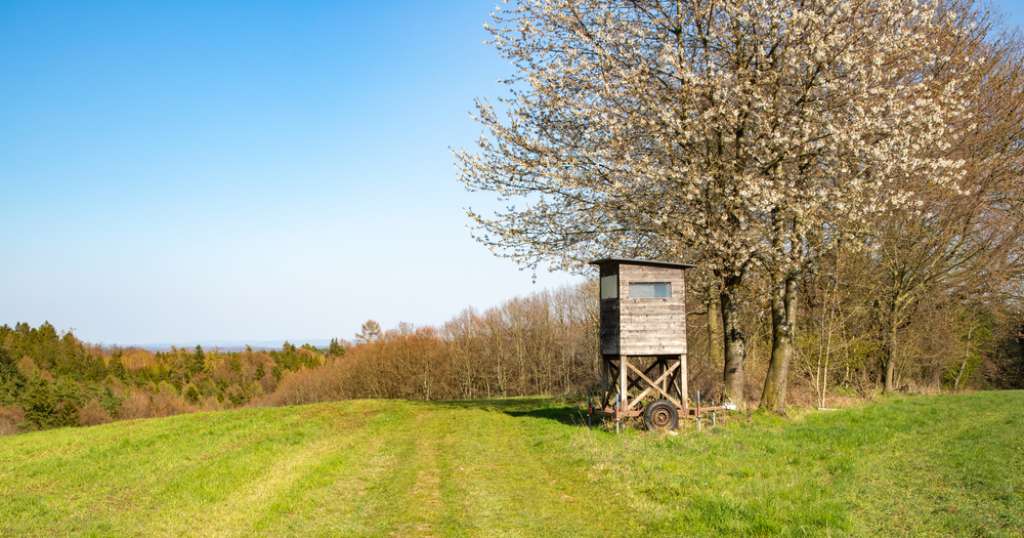
Taking it to the Next Level: DIY Elevated Hunting Blind Platform
An elevated hunting blind, often referred to as a "deer stand," offers hunters a distinct advantage – an unobstructed view of the terrain below. Elevated blinds are especially useful in open terrains where it's important to see over tall grass, shrubs, or to get a panoramic view of food plots. Here's a step-by-step guide to creating your very own DIY elevated hunting blind platform.
Why Elevated?
Before diving into the steps, it's essential to understand why an elevated stand might be the best choice:
- Visibility: Being elevated provides a better vantage point, allowing hunters to spot deer or other game from a distance.
- Safety: It keeps you out of the direct line of sight of animals, decreasing your chances of being detected.
- Versatility: Elevated blinds are effective for both bow hunting and gun hunting, offering a range of motion and angles for taking the perfect shot.
Materials Needed:
- Treated plywood (for flooring and walls)
- Sturdy posts or beams (for support)
- Ladder or steps for access
- Camouflage netting or material
- Nails, screws, and essential tools
- Safety harness and railings
Step 1: Selecting the Right Spot
The location of your elevated blind is crucial. Ideally, it should overlook food plots, water sources, or commonly used game trails. The height will depend on your terrain, but a good rule of thumb is to be 10-15 feet off the ground, offering a clear line of sight without being excessively high.
Step 2: Building a Sturdy Platform
Once you've marked your location, dig holes for your support beams. Secure them firmly in the ground, ensuring they're level. Using treated plywood, create the floor of your blind on top of these posts. The use of treated plywood ensures longevity and resistance to the elements.
Step 3: Constructing the Deer Blind
With your platform in place, it's time to build the actual blind. Create a frame using additional posts and then attach your treated plywood as walls. Like with the ground blind, ensure you have windows or ports for shooting, keeping in mind the preferences for bow or gun hunting.
Step 4: Safety Measures
Given that you're off the ground, safety becomes paramount. Install a sturdy ladder or steps for access. Adding railings around your platform can prevent accidental falls. Also, always use a safety harness when in your elevated blind.
Step 5: Camouflage and Finishing Touches
Just like the ground blind, your elevated blind should blend into its surroundings. Utilize camouflage netting or fabric, and add natural elements from the area. This will ensure you remain undetected by any approaching game.
Tips and Tricks for a Successful DIY Hunting Blind
Whether you've built a ground blind or an elevated platform, these extra touches can maximize your hunting experience:
- Weatherproofing: Beyond using treated plywood, consider adding a waterproof sealant. This ensures longevity against rain and snow.
- Mobility Matters: Especially for ground blinds, consider a design that's easy to dismantle and move. Animal patterns can change, and so can your spot.
- Natural Camouflage: Always gather materials from your immediate surroundings. It’s the best way to ensure your blind blends seamlessly.
- Safety First: When in an elevated blind, a safety harness isn’t just recommended—it's essential.
The Bottom Line
Crafting a DIY hunting blind, tailored to your needs, adds an unparalleled depth to your hunting experience. Whether it's the silent anticipation in a ground blind or the panoramic views from an elevated stand, the satisfaction of building it yourself makes the hunting season even more rewarding. As you get ready for your next adventure, remember to always prioritize safety, show respect for nature, and cherish the age-old dance between hunter and the wild.